

After a busy summer season full of neons, sparkles and bling, I feel like I’m finally ready to welcome the fall season with its warm and inviting tones. I sure love me some good solid nudes but I’d be lying if I didn’t admit that sometimes the subtle nude shades seem to be missing a little something something to give them that extra spark. If you’re like me and are looking for a good way to take your nude needs to the next level, well I have just the right thing for you!
Koko & Claire has partnered with CJS to bring you the most luxurious nude selection yet with a genius pairing including the new “Naked silhouette” stamping plates to take your nude game to the next level, whoever thought of nude shades as boring colours will have to think again because this pairing is not only exciting but also offers unlimited possibilities for looks to try this fall season.
Im Giselle from @egobeauty.ca and today I will show you how to create a sophisticated nude design that requires minimal effort and that’s sure to impress, so keep on reading
First things first, here's a list of what you will need to recreate this stylish look:
- K&C In the Buff - Naked and Gorgeous! Gel polishes
- CjS In the Buff - Naked and Gorgeous! Stamping Polishes
- CjS In the Buff - Naked and Gorgeous! Stamping Plates:
CJS H-204, CJS H-205, CJS 195, CJS 196,
- Detailer brush, I’m using K&C Detailer #3.
- K&C Shine Top Coat
- K&C Matte Top Coat
Now, onto the steps! ⬇️ ⬇️ ⬇️
Step 1:
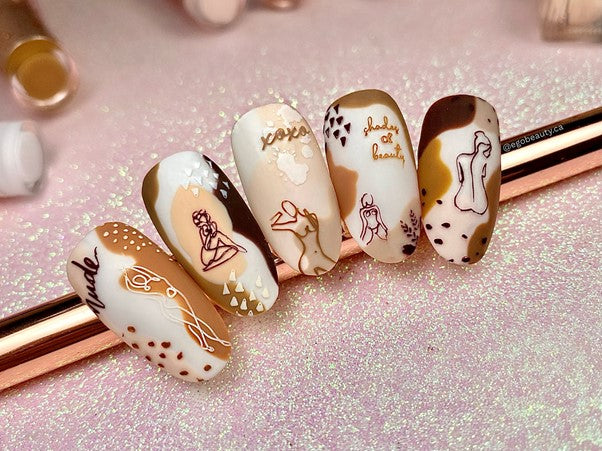
Start with a base of gel polish 352 “Marshmallow”, a milky white base perfect for our neutral tones to be combined with. Apply a couple of thin coats for the perfect coverage.

Step 2:
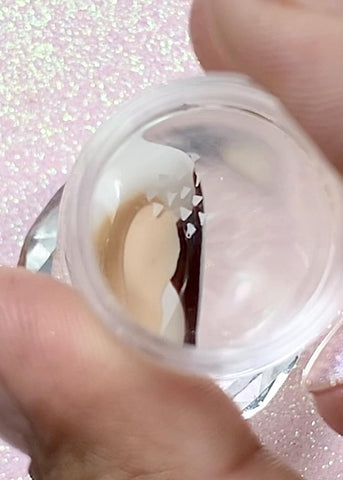
Then, apply gel polish 341 “Truffle” on a section of the nail, you can use the brush directly from the bottle.

Next, using a detailer brush, perfect the outline of the speckle and cure, we’re doing an abstract design so keep in mind it doesn’t have to be perfect or symmetrical at all.

Step 3:
Repeat the same process placing a couple more speckles on different parts of the nail, I’m using gel polish 344 “Coffee Bean” and I’m placing the second polish right across from the first spot.

Again, use your detailer brush to help you define the specks. Cure once you’re happy with the outcome.

Lastly, using gel polish “Peach”, place the third speck slightly overlapping the first two and define it as well. Finish with K&C Shine Top Coat.


Step 5:
We’ll get to stamping now! I’m using CJS stamping polish 112 and stamping plate CJS 195. Then place the polish on your favourite stamp, scrape off excess polish and using a clear jelly stamper, pick up the stamp and position it on the center of the nail. The clear jelly allows you to see through it so you can place the stamp just in the right spot.

Press down on the nail and gently roll away the stamper

Repeat using a different stamp to add more abstract elements to our design.

Step 6:
Finish off with K&C Matte Top Coat.

And voila! We’re done 🤩🤩🤩
How fun was that?
Neutral tones are the perfect base to add some detailed line work for an elegant yet eye catching design, however It is not always easy for all to hand paint intricate designs so using stamps can be a very effective solution to the problem. Combining a few gel polish shades with some stamps will give us results that are sure to impress but that were in fact done with ease!

I love a good nude shade for a casual and elegant everyday look but sometimes I do need a little something to spice up my day and with the new In the Buff - Naked and Gorgeous! Collection the task has gotten so easy that it will have you saying “send more nudes!” 😁💅💗
Give this tutorial a try and make sure to tag me @egobeauty.ca, @kokoandclaire and @clearjellystamper on social media so we can see and share your beautiful creations.
Until next time, stay creative!! Xxo
Giselle 💗💗💗